


This tutorial will show you how to synchronize a ResourceChart view with the ActivityChart view with MindFusion.DataViews for Silverlight.
1. Create a Silverlight application and add an ActivityChart view with data
Follow steps 1 through 3 from Tutorial 3.
2. Add a ResourceChart to the main window
If you followed the previous steps, a ResourceChart control should be present in Visual Studio Toolbox. Click on this item and drag it to the window's working area. This creates a new ResourceChart control on the window. Select the newly created control and from the Properties window set its Margin to 0 and its Name to resourceView. In the root Grid on the window, add two RowDefinition items and distribute the two chart views respectively into Grid.Row 0 and Grid.Row 1. The complete XAML for Window1 should look similar to this:
XAML
 Copy Code Copy Code
|
|---|
<Window x:Class="Tutorial4.Window1" |
3. Bind the ResourceChart to the project
In the code-behind, after you've created the IProjectViewModel for the activityView, all you have to do to bind the ResourceChart to the same project is to set its DataContext property to the newly created project.
| C#
Copy Code
|
|---|
resourceView.DataContext = project; |
| Visual Basic
Copy Code
|
|---|
resourceView.DataContext = project |
 Note Note |
|---|
It is not necessary that the project is created by the ActivityChart object and then bound to the ResourceChart object. The opposite is also true and the two chart views will again be synchronized by using the same IProjectViewModel. |
4. Build and run
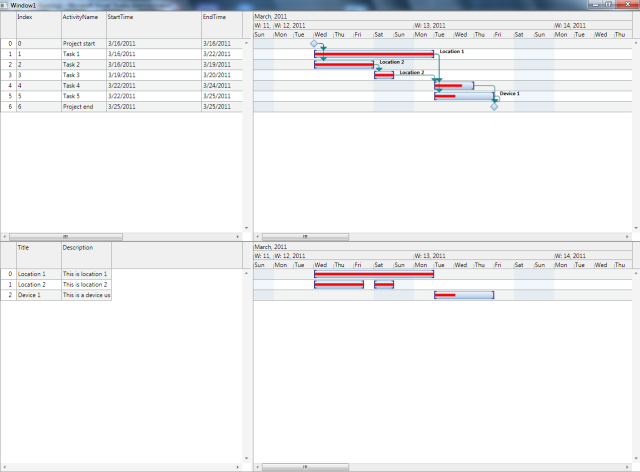
Compile and run the application. The result will be similar to the image below:
| Note |
|---|
You can find the complete source code of this tutorial in the product installation folder, under the folder for the appropriate .NET version and language. |