


This tutorial will help you create a very simple data-bound report from scratch. The following steps are explained in more details below:
- Creating a new project
- Adding a MindFusion report to the project
- Adding a data source to the project
- Instantiating the report
- Adding the data source to the MindFusion report
- Creating a data-bound DataRange
- Displaying the report
- Running the application
1. Creating a new project
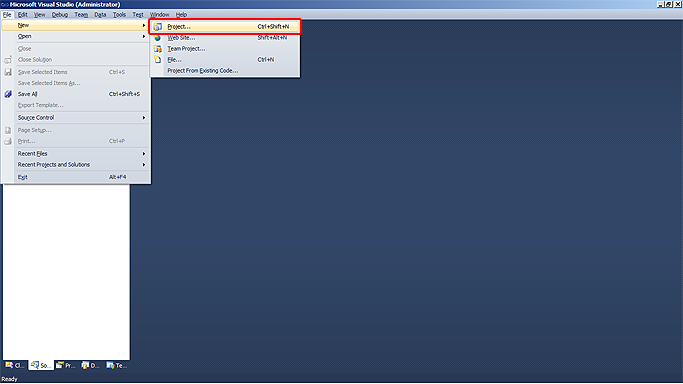
From MS Visual Studio select the File -> New -> Project menu command in order to create a new project.
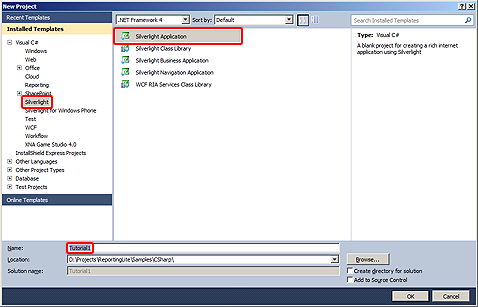
In the dialog box that appears, select the project language and type. Select the desired programming language, then pick the 'Windows' category and select 'Silverlight Application' from the list to the right. Type the name and the location of the project in the text boxes at the bottom of the dialog, then click 'OK'. This tutorial uses 'Tutorial1' as a name of the project.
2. Adding a MindFusion report to the project
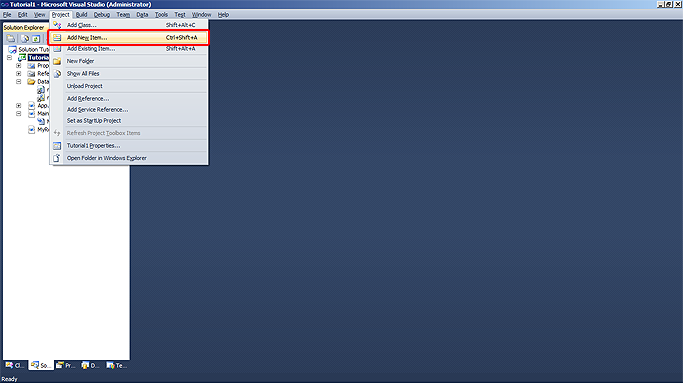
For the purposes of this tutorial we will create the new report as a resource in a separate resource dictionary. To add a new dictionary to the project, select 'Project -> Add New Item...' menu command.
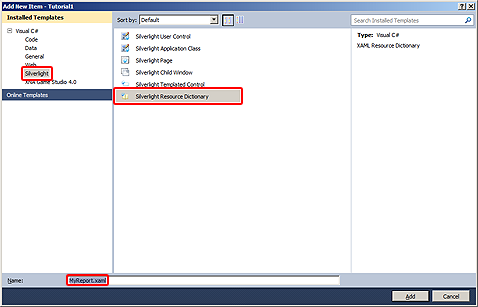
In the dialog box that appears, select the Silverlight Resource Dictionary item in the list, then type the name of the dictionary file in the text box at the bottom of the dialog ('MyReport.xaml' for the purposes of this tutorial) and click 'Add'. If the Silverlight Resource Dictionary item is not visible in the list to the right, select 'Silverlight' in the tree to the left first.
A new empty resource dictionary is added to the project. Before we can create the report in the dictionary, we need to add a reference to the MindFusion.Reporting.Silverlight.dll assembly to the project. To do this, locate to the 'References' item in the Solution Explorer, right-click on it, then select 'Add Reference...' from the context menu. In the 'Add Reference' dialog box that appears, select 'Browse' then navigate to the MindFusion.Reporting.Silverlight.dll file and click 'OK'.
Now that the reference to the reporting assembly is added to the project we can create our report. Modify the definition of the newly added resource dictionary definition to include the reporting XML namespace as illustrated below:
XAML
 Copy Code Copy Code
|
|---|
<ResourceDictionary xmlns="http://schemas.microsoft.com/winfx/2006/xaml/presentation" |
Then add the following code to the dictionary:
| XAML
Copy Code
|
|---|
<r:Report x:Key="myReport"> |
The code above declares a new empty report with a single page in it.
3. Adding a data source to the project
In this tutorial we will be using an XML as a data source. Before adding the XML data source, create a new 'Data' folder in the project, then right-click on the new folder and select 'Add->Existing Item...' from the context menu. Navigate to the nwind.xml fail located at \VS2010 (.NET 4)\Samples\nwind.xml relative to the installation folder of the component and click 'Add Link'.
Now that the XML is added to the project, we need to load it and enumerate the available products. To do this open MainPage.xaml.cs (or MainPage.xaml.vb in Visual Basic) and add the following code in the main Window constructor, after the call to InitializeComponent:
| C#
Copy Code
|
|---|
XDocument document = XDocument.Load("Data/nwind.xml"); |
| Visual Basic
Copy Code
|
|---|
Dim document = XDocument.Load("Data/nwind.xml") |
4. Instantiating the report
The FromDictionary method of the Report class facilitates report loading from resource dictionaries. The following code illustrates how to load the report myReport from the MyReport.xaml resource dictionary.
| C#
Copy Code
|
|---|
var report = Report.FromDictionary(new Uri("/Tutorial1;component/MyReport.xaml", UriKind.Relative), "myReport"); |
| Visual Basic
Copy Code
|
|---|
Dim report As Report = report.FromDictionary(New Uri("/Tutorial1;component/MyReport.xaml", UriKind.Relative), "myReport") |
5. Associating the data source with the MindFusion report
The data source is supplied to the report through its DataContext property. This is done manually through code. To associate the data source with the report, assign the products variable to the DataContext property.
| C#
Copy Code
|
|---|
report.DataContext = products; |
| Visual Basic
Copy Code
|
|---|
report.DataContext = products |
6. Creating a data-bound DataRange
In order to display the data from the associated data source, we need to modify our report by adding a DataRange object to it. The following XAML code illustrates how:
| XAML
Copy Code
|
|---|
<r:Report x:Key="myReport"> |
7. Displaying the report
Now that our report is instantiated and its data source has been assigned, we can display it on the main application page. Open the main application page by double-clicking on the MainPage.xaml. Modify the XAML code of the page by adding a ReportViewer element to the LayoutRoot grid. Set the name of the report viewer to reportViewer. The following code illustrates the modified XAML:
| XAML
Copy Code
|
|---|
<Grid Name="LayoutRoot"> |
In the code behind, add the following code after the report's data source assignment:
| C#
Copy Code
|
|---|
report.Run(); |
| Visual Basic
Copy Code
|
|---|
report.Run() |
The code above processes the report and associates it with the viewer.
8. Running the application
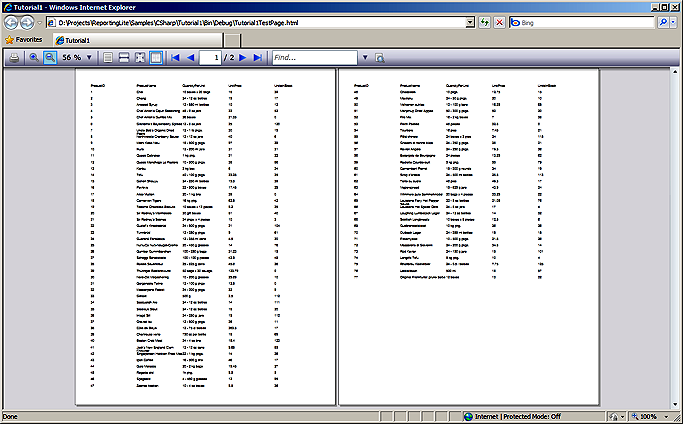
The application is ready. Compile and run to see the result. After expanding the main application form, it should look similar to the following:
Click the 'Print' button in the viewer's toolbar to print the report.