This topic provides you with a detailed and easy step-by-step instructions on how to create your first map from a *.shp and a *.dbf file.
1. Add the MindFusion Package component to the VisualStudio toolbox.
1.1 Create a new WinForms project in Microsoft VisualStudio.
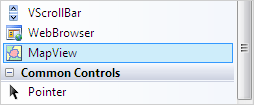
1.2 Open the main form in Design view, richt click the Toolbox and select 'Choose Items...' Navigate to the folder, which contains the MindFusion.Mapping.WinForms assembly for your chosen .NET version. It is usually of type "C:\Program Files\MindFusion\MindFusion.Mapping for WinForms\VS2010 (.NET 4.0)". Select the assembly and click "OK" - the MapView component should appear in the Toolbox.

2. Set the map.
2.1 In the code behind file for your form use the BaseMap property of the MapView object you created in step 1.2.
VB.NET
 Copy Code Copy Code
|
|---|
mapView.BaseMap = Map.FromFile("C:\Maps\countries_level_1\Bulgaria.shp", True, "NAME_1") |
Here we set the first parameter designates the location of the *.shp file from where we load the map. The second parameter tells the control that a corresponding database file is also present and should be loaded. The third parameter gives precise instructions on the name of the column in the *.dbf file, whose fields should be used as map element labels.
3. Set the colors and draw the map.
3.1 Call the AssignColors method that will paint your map in such a way that no two adjacant polygons will have the same color:
C#
 Copy Code Copy Code
|
|---|
mapView.BaseMap.AssignColors(); |
VB.NET
 Copy Code Copy Code
|
|---|
mapView.BaseMap.AssignColors() |
4. Compile and run the project. By now you must have a map displayed in the MapView control.


