This tutorial illustrates how to adjust various settings of a report in order to customize its appearance. The following steps are explained in more details below:
- Prerequisites
- Adding report header and footer
- Customizing background colors
- Customizing borders
- Customizing fonts
- Additional customizations
Prerequisites
This tutorial continues from where Tutorial 2: Binding to a Data Source has ended. It is therefore assumed that the reader is acquainted with Tutorial 1 and Tutorial 2 before reading further.
1. Adding report header and footer
Headers and footers can be added to the report through the HeaderTemplate and FooterTemplate properties of the Page class. These properties specify a DataTemplate which is instantiated once for each page in the final report. The root element of the DataTemplate is expected to be of type ItemContainer. The following XAML code illustrates how to add a footer to the current report, which displays the current page and the total number of pages:
XAML
 Copy Code Copy Code
|
|---|
<r:Report x:Key="myReport"> |
The width component of the size of headers and footers is ignored - their width is always the same as the width of the element they belong to. In the code above the width is set to 100% for clarity. The height of the footer in the above case is set to 30 (device independent pixels as no unit is specified explicitly). The footer contains a single Label, which displays the current page and the total number of pages in the report. This is achieved through the use of an expression. To learn more about expressions, check the Overview topic. To learn more on how to use expressions in label texts, check Using Expressions in Label Texts.
If you run the application now, you will notice a small text at the bottom of each page specifying the current page and the total number of pages in the report.
2. Customizing background colors
Many report elements allow their background color to be changed. The page header/footer and the page itself allow this too. In this tutorial we will set the background of the footer, created in the previous step, to Gainsboro. To do this, simply assign "Gainsboro" to the Background of the item container, representing the footer. The following XAML code illustrates this, the new coded is highlighted:
| XAML
Copy Code
|
|---|
<r:ItemContainer Size="100%,30" Background="Gainsboro"> |
Additionally, we will customize the background of the alternating rows of the embedded data range. To do this, set the AlternatingBackground property of the DataRange to PaleGoldenrod the same way we set the brush of the footer above. Finally, set the background of the embedded data range's header to LightSteelBlue.
3. Customizing borders
Many report elements allow their border to be customized. In this tutorial we will set the border of the outer data range. To do this, simply set the BorderBrush and BorderThickness properties of the parent DataRange to the appropriate values. In this particular case we will set those to #A0A8B0 and 1 respectively. The following XAML code illustrates the modified code:
| XAML
Copy Code
|
|---|
... |
4. Customizing fonts
The font in MindFusion.Reporting for Silverlight is governed by a set of properties - FontFamily, FontSize, FontStyle and FontWeight. These properties are attached and inherit through the report hierarchy, which means that specifying any of them on a parent element will automatically propagate the value to all children of this element which do not have an explicitly specified value for this particular property. For example, to change the font family of all elements in the report, simply set the FontFamily property on the Report element. To change the value of an individual label, set the FontFamily property on that label.
In this tutorial we will change the font of the report to ensure that all texts fit in their corresponding elements. Set the FontFamily to "Arial" and FontSize to "8" as illustrated by the XAML code below:
| XAML
Copy Code
|
|---|
<r:Report x:Key="myReport" FontFamily="Arial" FontSize="8"> |
5. Additional customizations
Running the report now reveals some minor flaws that we might want to get fixed. For example, the instances of the outer data range appear to be adjoined to each other because of the border we applied to the data range earlier. To insert some spacing between adjacent instances, set the Bottom component of the Margin property of the outer data range to, say, "5".
We may further improve the report by preventing the data range instances to split accross pages. In order to do this, set the CanOverflow property of the ItemContainer representing the item template of the outer data range to false.
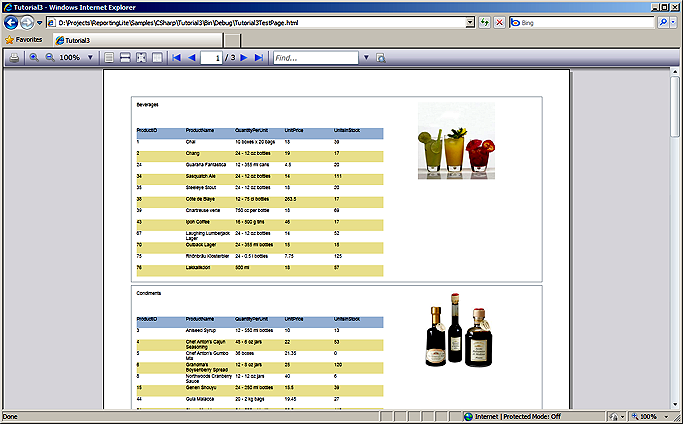
Running the application now will result in the following: