Tutorial 1: Getting Started
This tutorial will show you how to create a simple day schedule application based on JPlanner.
Create a new Java project, add a reference to the JPlanner.jar to this project and create a single package named tutorial1. In this package add a new class named MainWindow. Inherit the MainWindow class from JFrame and add a main method that displays an instance of the MainWindow:
Java
 Copy Code Copy Code
|
|---|
public class MainWindow extends JFrame |
Define a variable of type Calendar as a member field of the MainWindow class. In the constructor initialize this variable with a new instance of the Calendar class and add the newly created calendar to the window:
| Java
Copy Code
|
|---|
calendar = new Calendar(); |
Do not forget to import the Calendar:
| Java
Copy Code
|
|---|
import com.mindfusion.scheduling.Calendar; |
Change CurrentView to Timetable. The timetable view displays rows of cells corresponding to the time of the day, and the cells in each column correspond to a specific date. Set ShowDayHeader of Calendar.TimetableSettings to true. TimetableSettings as the name suggests contains the settings that effect the timetable view. There are corresponding settings objects available for each of the view types.
Initially the timetable displays only one day - the current day. To change the set of displayed days, add the following lines to the initialization code:
| Java
Copy Code
|
|---|
calendar.beginInit(); |
The code above adds 5 days to the timetable view, starting from today.
The first and last methods called above are used together to enclose code, which contains series of modifications to the calendar. beginInit disables the internal update logic of the control, while endInit resumes the control's normal behavior and updates its internal state to reflect all changes made since the call to beginInit.
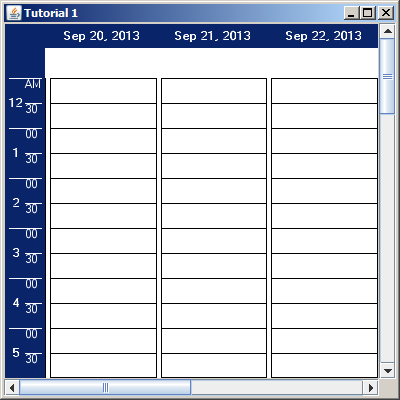
You can also set VisibleColumns to more than 1 to ensure more than one column is visible initially.
Compile and run the application. If you have set VisibleColumns to 3, the result should look like the image shown below.